A Sweet Memory: My Love for Philadelphia Cheesecake
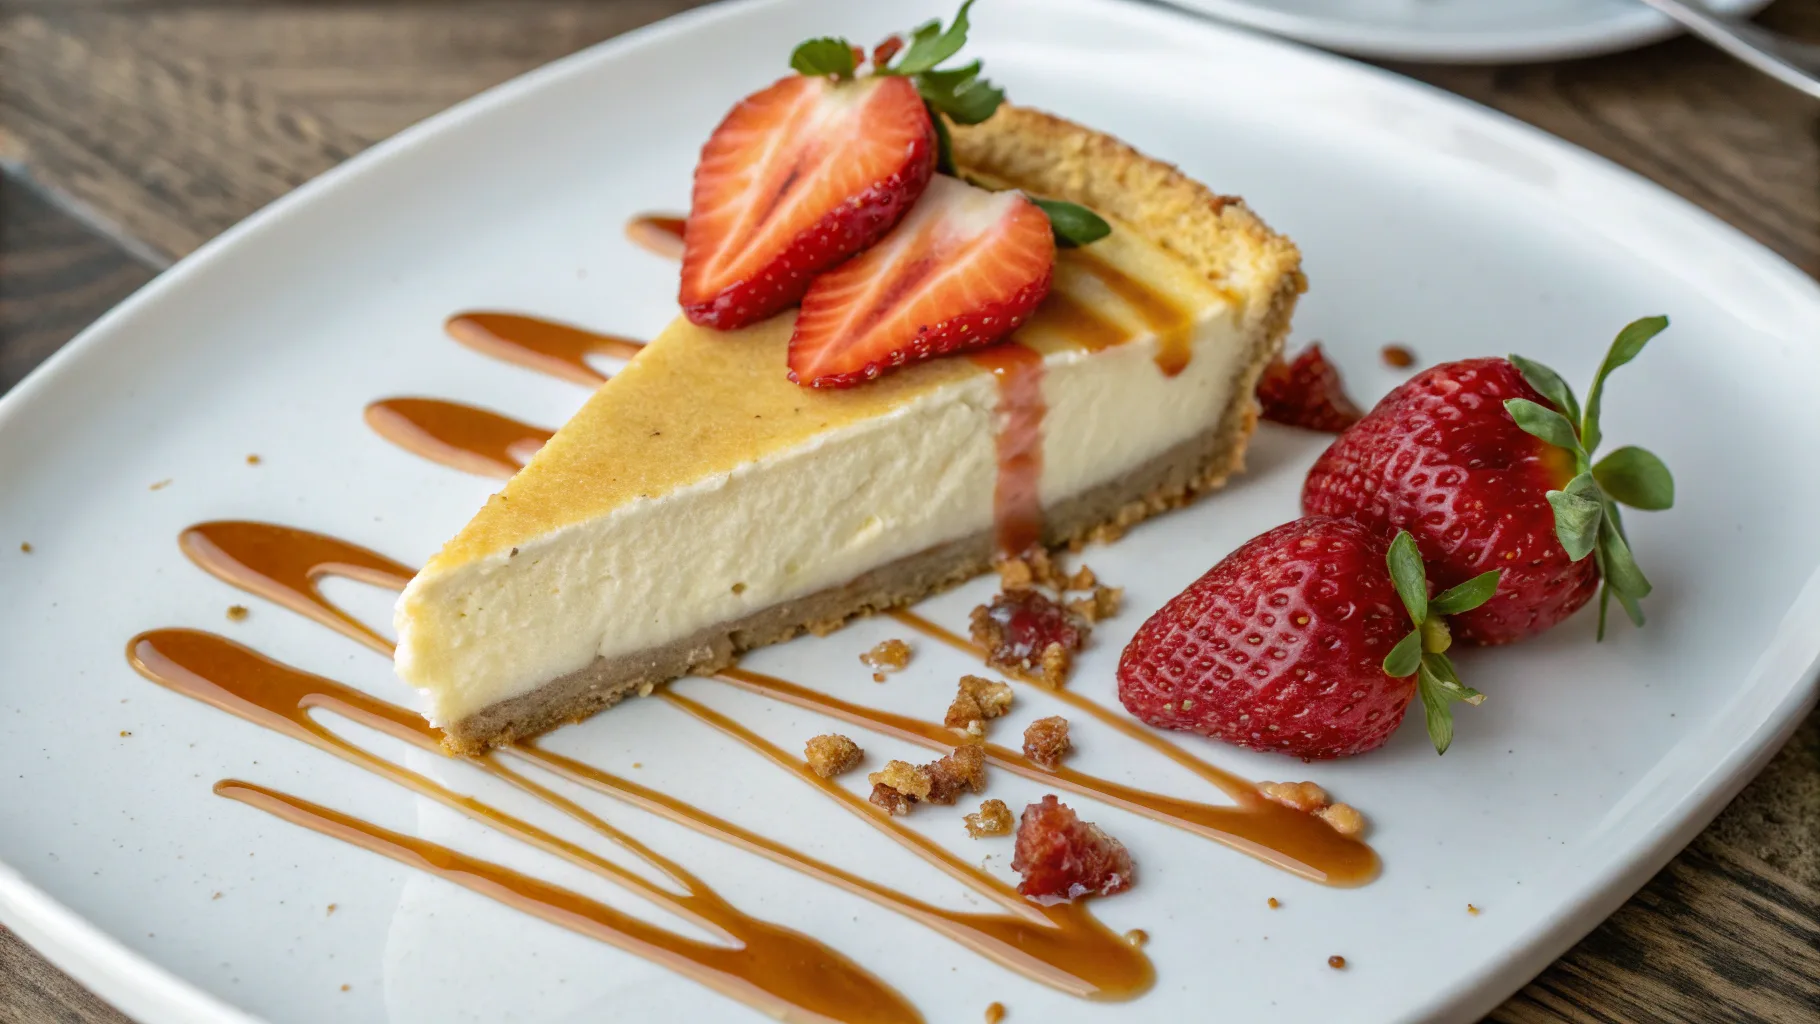
I still remember the first time I tasted a Philadelphia cheesecake. It was at my grandmother’s house on a warm summer afternoon. The moment I took that first bite, the smooth, creamy texture melted in my mouth, perfectly balanced by the buttery, slightly crunchy graham cracker crust. It was love at first bite.
Every family gathering after that had one thing in common—this iconic cheesecake sitting proudly on the dessert table. My grandmother swore by Philadelphia cream cheese, insisting it was the secret to the creamiest, dreamiest cheesecake. And she was right.
Now, I’m excited to share this timeless recipe with you, along with pro tips to ensure your cheesecake turns out just as perfect as the one I fell in love with all those years ago. Whether you’re a first-time baker or a cheesecake expert, this foolproof guide will help you make the best Philadelphia cheesecake ever!
Table of Contents
Why You’ll Love This Philadelphia Cheesecake Recipe
Philadelphia cheesecake is simple to make, rich in flavor, and incredibly creamy. Whether you’re baking for a special occasion or just craving a homemade dessert, this recipe is a must-try!
Rich and Creamy Texture
Philadelphia cream cheese is the key to a smooth, velvety cheesecake that melts in your mouth. Unlike New York-style cheesecake, which is dense and heavy, this version is lighter and silkier, making every bite irresistible.
Simple 3-Ingredient Filling
You only need three basic ingredients for the filling:
- Philadelphia cream cheese – The star ingredient, providing a tangy, creamy texture.
- Sugar – Sweetens and enhances the flavor.
- Eggs – Helps set the cheesecake to the perfect consistency.
No sour cream, heavy cream, or fancy techniques—just pure, creamy goodness!
Easy 2-Ingredient Crust
The buttery graham cracker crust adds a subtle crunch that complements the creamy filling. It’s made with just:
- Graham cracker crumbs – The perfect slightly sweet base.
- Melted butter – Holds everything together and adds richness.
Customizable Toppings
One of the best things about cheesecake is that you can dress it up or keep it classic. Try these delicious toppings:
- Fresh berries – Strawberries, raspberries, or blueberries add a fresh, tangy contrast.
- Caramel or chocolate drizzle – For an extra indulgent twist.
- Whipped cream – A light and fluffy finishing touch.
- Crushed nuts or cookie crumbles – Adds a bit of crunch.
No matter how you serve it, this Philadelphia cheesecake is guaranteed to impress!
Ingredients for Philadelphia Cheesecake
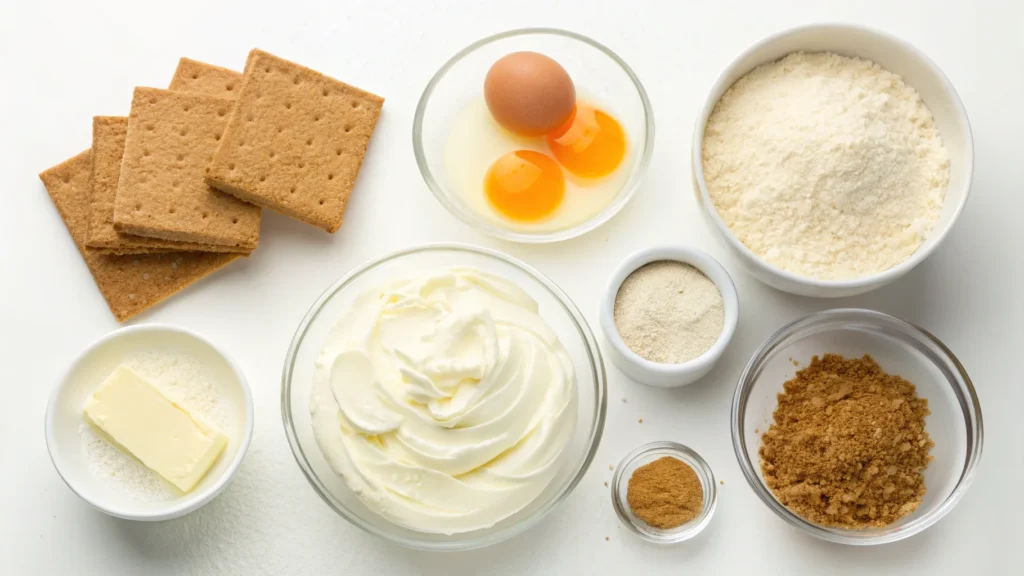
The beauty of this Philadelphia cheesecake recipe is its simplicity. With just a few high-quality ingredients, you can achieve a rich, creamy, and perfectly balanced dessert.
Ingredients for the Crust
A strong yet tender crust sets the foundation for a great cheesecake. This classic graham cracker crust is buttery, slightly crunchy, and easy to make with just two ingredients:
- 1 ¼ cups graham cracker crumbs – Provides a sweet and crumbly base. You can crush whole graham crackers in a food processor or buy pre-made crumbs.
- ¼ cup melted butter – Binds the crumbs together for a firm crust that holds up under the creamy filling.
Pro Tip: If you want to add more flavor to your crust, mix in 1 tablespoon of sugar or a pinch of cinnamon for a subtle warmth.
Ingredients for the Filling
This cheesecake filling is smooth, rich, and incredibly easy to prepare. You only need three main ingredients, but there’s room to add extra flavors if you’d like!
- 3 (8-ounce) packages of Philadelphia cream cheese, softened – The key to a creamy, velvety texture. Make sure it’s at room temperature to prevent lumps.
- ¾ cup granulated sugar – Sweetens the cheesecake and balances the tanginess of the cream cheese.
- 3 large eggs – Helps set the cheesecake while keeping it smooth and rich.
Optional Add-Ins for Extra Flavor:
- 1 teaspoon vanilla extract – Adds a subtle sweetness and depth of flavor.
- ¼ teaspoon almond extract – For a nutty, bakery-style taste (use sparingly, as it’s strong).
- Zest of 1 lemon – A bright, citrusy twist for a refreshing cheesecake.
- ½ cup mini chocolate chips – A fun way to add a hint of chocolate.
Variations and Substitutions
- Gluten-Free Crust: Swap graham crackers for gluten-free cookies or almond flour crust.
- Chocolate Crust: Use crushed chocolate wafer cookies instead of graham crackers.
- Dairy-Free Option: Substitute Philadelphia cream cheese with a high-quality dairy-free alternative.
With these simple, high-quality ingredients, you’ll be well on your way to making a perfectly creamy and delicious cheesecake.
Essential Tools for Baking Cheesecake
Baking the perfect Philadelphia cheesecake doesn’t require fancy equipment, but having the right tools makes the process easier and ensures a smooth, creamy texture. Here are the must-have items for cheesecake success!
9-Inch Springform Pan
A springform pan is essential for cheesecake because it allows for easy removal without damaging the crust or filling. Unlike regular cake pans, the removable sides ensure your cheesecake stays intact when serving.
- Pro Tip: To prevent leaks, wrap the bottom of the pan with heavy-duty aluminum foil if using a water bath.
Electric Mixer (Hand or Stand Mixer)
To achieve a smooth and lump-free cheesecake batter, an electric mixer is your best friend.
- A hand mixer works well for home bakers.
- A stand mixer makes the process even easier, especially when mixing for extended periods.
Pro Tip: Always mix on low to medium speed to avoid over-aerating the batter, which can cause cracks during baking.
Mixing Bowls
You’ll need at least two mixing bowls—one for the crust and one for the filling. Choose stainless steel or glass bowls for easy cleaning and durability.
Measuring Cups and Spoons
Accurate measurements are crucial for baking. Use:
- Dry measuring cups for flour, sugar, and graham cracker crumbs.
- Liquid measuring cups for melted butter.
- Measuring spoons for vanilla extract and other small ingredients.
Rubber Spatula
A rubber spatula helps you scrape down the sides of the mixing bowl, ensuring all ingredients are fully incorporated without overmixing.
Oven Thermometer
Not all ovens heat evenly, and cheesecake requires precise baking temperatures. An oven thermometer ensures your oven is at the correct temperature (325°F / 163°C) for even baking.
Instant-Read Thermometer (Optional, But Helpful!)
A properly baked cheesecake should have an internal temperature of 145°F (63°C). Using an instant-read thermometer can help prevent overbaking and ensure a perfectly set center.
Baking Sheet (For Water Bath Method)
A large baking sheet or roasting pan is necessary if you plan to use a water bath (bain-marie) to prevent cracks in your cheesecake.
- Pro Tip: Always place the springform pan inside a larger roasting pan and fill it with hot water about halfway up the sides of the pan.
Parchment Paper (For Easy Removal)
While not required, lining the bottom of the springform pan with parchment paper can make cheesecake removal even easier.
With these essential tools, you’re set up for success!
How to Make Philadelphia Cheesecake (Step-by-Step Guide)
Now that you have all the ingredients and tools ready, it’s time to make the perfect Philadelphia cheesecake! Follow this step-by-step guide to achieve a smooth, creamy, and crack-free cheesecake every time.
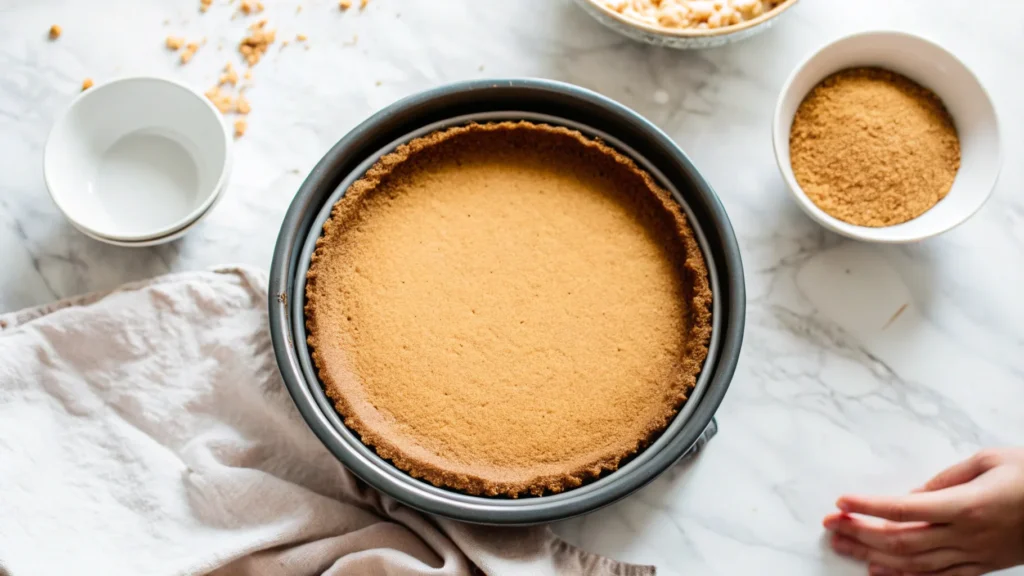
Step 1: Preparing the Crust
A good crust provides the perfect foundation for your cheesecake. Here’s how to make it:
1. Preheat Your Oven
- Set your oven to 350°F (175°C).
- This ensures the crust bakes evenly and sets properly.
2. Mix the Crust Ingredients
- In a mixing bowl, combine:
- 1 ¼ cups graham cracker crumbs
- ¼ cup melted butter
- Stir until the mixture resembles wet sand and holds together when pressed.
3. Press the Crust into the Pan
- Grease a 9-inch springform pan with butter or non-stick spray.
- Pour the crust mixture into the pan and press it down firmly using:
- The back of a spoon
- A flat-bottomed glass
- Make sure the crust is evenly distributed.
4. Pre-Bake the Crust
- Bake the crust at 350°F (175°C) for 10 minutes.
- This step sets the crust and prevents it from becoming soggy when the filling is added.
- Let it cool completely while you prepare the filling.
Step 2: Mixing the Cheesecake Filling
1. Beat the Cream Cheese and Sugar
- In a large mixing bowl, beat:
- 3 (8-ounce) packages of Philadelphia cream cheese, softened
- ¾ cup granulated sugar
- Use a hand mixer or stand mixer on low to medium speed until smooth.
Pro Tip: Avoid high-speed mixing—it incorporates too much air and can cause cracks!
2. Add the Eggs One at a Time
- Add 3 eggs, one at a time, mixing on low speed just until combined.
- Do not overmix—this can create air bubbles and lead to cracks.
3. Add Optional Flavor Enhancements
- Stir in 1 teaspoon vanilla extract for classic flavor.
- For a citrus twist, add zest of 1 lemon.
- If using almond extract, only add ¼ teaspoon, as it’s strong.
Step 3: Baking Your Cheesecake
1. Pour the Filling Over the Crust
- Slowly pour the cheesecake batter over the cooled crust in the springform pan.
- Use a spatula to smooth the top.
2. Bake at the Right Temperature
- Reduce the oven temperature to 325°F (163°C).
- Bake for 35–45 minutes until the edges are set but the center is still slightly jiggly.
- If using a thermometer, the cheesecake should reach 145°F (63°C) in the center.
Pro Tip: Overbaking can cause cracks. If the center is slightly jiggly but not liquid, it will set perfectly as it cools!
3. Let the Cheesecake Cool Slowly
- Turn off the oven and leave the cheesecake inside with the door slightly open for 1 hour.
- This prevents sudden temperature changes that cause cracks.
4. Refrigerate for Best Texture
- After cooling, transfer the cheesecake to the fridge and chill for at least 4 hours (preferably overnight).
- This step enhances the flavor and helps the texture set properly.
Part 5: How to Serve This Philadelphia Cheesecake Recipe

After patiently waiting for your Philadelphia cheesecake to chill, it’s finally time to serve! To make sure your cheesecake looks as good as it tastes, follow these pro tips for slicing and topping your dessert.
Best Way to Slice Cheesecake
Slicing cheesecake can be tricky because of its creamy texture. Here’s how to get clean, bakery-style slices every time:
1. Use a Sharp Knife
- A long, sharp knife works best for cutting through the dense cheesecake.
2. Dip the Knife in Warm Water
- Fill a glass with hot water, dip the knife in, and wipe it dry before each cut.
- This helps the knife glide smoothly through the cheesecake without sticking.
3. Wipe the Knife After Each Cut
- Use a paper towel or clean cloth to remove any cheesecake residue before making the next cut.
4. Cut in Even Portions
- For 12 slices, cut the cheesecake in half, then into quarters, and finally divide each quarter into three slices.
Pro Tip: If you’re serving a crowd, you can pre-slice the cheesecake before chilling. This makes it easier to serve without messing up the presentation.
Tasty Toppings for Your Cheesecake
One of the best things about Philadelphia cheesecake is how well it pairs with different toppings. Whether you love fruity, chocolatey, or nutty flavors, here are some delicious options:
Classic Toppings
- Fresh Berries – Strawberries, raspberries, or blueberries add a tart contrast to the sweet cheesecake.
- Whipped Cream – A light and fluffy topping that balances the richness.
- Chocolate or Caramel Drizzle – Adds extra indulgence to every bite.
Fruity Twists
- Cherry Pie Filling – A timeless topping for a classic cheesecake.
- Mango or Passionfruit Puree – Adds a tropical flair.
- Lemon Curd – A tangy contrast to the creamy filling.
Crunchy Add-Ons
- Crushed Cookies – Sprinkle Oreo crumbs or graham crackers on top.
- Chopped Nuts – Toasted almonds, pecans, or walnuts add a crunchy bite.
Decadent Dessert Toppings
- Peanut Butter Swirl – Mix peanut butter with a little cream and drizzle over the top.
- Nutella Drizzle – A chocolate-hazelnut topping for extra richness.
- Toasted Coconut Flakes – Perfect for a tropical twist.
Pro Tip: If serving with a fruit topping, spoon the fruit over each slice individually rather than covering the entire cheesecake. This keeps leftovers fresher for longer!
Now that your cheesecake is sliced and topped to perfection, it’s time to enjoy every creamy, delicious bite!
How to Prevent Cheesecake Cracking
There’s nothing worse than baking a beautiful cheesecake only to find cracks on the surface. While cracks don’t affect the taste, they can take away from the perfect, smooth appearance of your dessert. Follow these pro tips to keep your Philadelphia cheesecake looking flawless!
1. Avoid Overmixing the Batter
- Overmixing incorporates too much air into the batter. As the cheesecake bakes, the air bubbles expand and then collapse, causing cracks.
- Always mix on low to medium speed and stop once the ingredients are fully combined.
- When adding eggs, mix one at a time and only until just incorporated.
Pro Tip: Use a spatula to fold the batter gently instead of overworking it with a mixer.
2. Use Room Temperature Ingredients
- Cold cream cheese can lead to lumpy batter, which requires extra mixing—another cause of cracks.
- Before starting, let your cream cheese, eggs, and any other refrigerated ingredients sit at room temperature for about 30-60 minutes.
Pro Tip: To speed up softening cream cheese, cut it into small cubes and let it rest for 15–20 minutes or microwave it for 15 seconds on low power.
3. Bake at the Right Temperature
- Cheesecake needs gentle, even heat to cook properly. Baking at too high a temperature can cause the edges to cook too fast while the center remains soft, leading to cracks.
- Always bake at 325°F (163°C) rather than higher temperatures.
Pro Tip: Use an oven thermometer to ensure your oven is at the correct temperature, as many ovens run hotter or colder than the set temperature.
4. Try a Water Bath (Bain-Marie) for Even Baking
A water bath helps the cheesecake bake slowly and evenly, preventing cracks by keeping moisture in the oven.
How to Set Up a Water Bath:
- Wrap the outside of your springform pan with heavy-duty aluminum foil to prevent leaks.
- Place the pan inside a larger roasting pan.
- Pour hot water into the roasting pan until it reaches halfway up the sides of the springform pan.
- Bake as directed.
Pro Tip: If you don’t want to use a water bath, place a separate baking dish filled with water on the rack below your cheesecake. This also helps create a humid baking environment.
5. Let the Cheesecake Cool Gradually
- Sudden temperature changes can cause the cheesecake to shrink too quickly, leading to cracks.
- Once the baking time is up, turn off the oven and leave the cheesecake inside with the door slightly open for 1 hour.
- Then, remove it from the oven and let it cool at room temperature for another 30 minutes before refrigerating.
Pro Tip: Run a knife around the edges of the cheesecake as soon as it comes out of the oven. This prevents the sides from sticking to the pan, which can cause cracks as the cheesecake cools and contracts.
6. Chill for at Least 4 Hours (or Overnight!)
- Cheesecake needs time to set properly in the fridge. Refrigerate for at least 4 hours, but for the best texture, overnight chilling is recommended.
- Cover loosely with plastic wrap or foil to prevent moisture loss.
7. Fixing Cracks (If They Happen!)
If your cheesecake still cracks, don’t worry! Here’s how to fix it:
- Use a warm spoon – Run the back of a warm spoon over the cracks to smooth them out.
- Cover with toppings – Whipped cream, fruit compote, or chocolate ganache can hide imperfections beautifully.
- Turn it into a swirl cheesecake – If cracks appear before chilling, drizzle fruit puree or caramel and use a toothpick to swirl it in for a decorative effect.
By following these simple tips, you’ll have a smooth, crack-free cheesecake every time!
How to Make a Water Bath for Cheesecake
Using a water bath (bain-marie) is one of the best ways to ensure your Philadelphia cheesecake bakes evenly and without cracks. This technique creates a humid environment in the oven, which prevents the cheesecake from drying out and developing cracks on the surface.
Even if you’ve never used a water bath before, don’t worry! It’s simple and worth the extra step for a smooth, creamy cheesecake.
Step 1: Prepare the Springform Pan
Since a springform pan has a removable bottom, water from the bath can leak in and ruin your crust. To prevent this, you need to wrap your pan properly.
- Cut two large sheets of heavy-duty aluminum foil.
- Wrap the bottom and sides of the pan tightly, ensuring no gaps where water could seep in.
- For extra protection, place the foil-wrapped pan inside an oven-safe silicone baking bag or another large oven-safe bag.
Pro Tip: If you’re worried about leaks, place the cheesecake pan on a baking sheet instead of in a water bath and put a separate dish of hot water on the lower oven rack.
Step 2: Set Up the Water Bath
- Place the wrapped springform pan inside a large roasting pan or deep baking dish.
- Boil water in a kettle or saucepan.
- Carefully pour hot water into the roasting pan, filling it until it reaches about halfway up the sides of the springform pan.
Pro Tip: Pour the water after placing the roasting pan in the oven to prevent spills when transferring it.
Step 3: Bake as Directed
- Bake your cheesecake at 325°F (163°C) as directed in the recipe.
- The water bath will keep the oven humid, helping the cheesecake bake gently and evenly.
Step 4: Remove the Cheesecake from the Water Bath
- When the cheesecake is done baking, turn off the oven and leave the door slightly open for 1 hour to allow gradual cooling.
- Carefully remove the cheesecake from the water bath.
- Unwrap the foil and place the cheesecake on a wire rack to continue cooling.
Step 5: Refrigerate Before Serving
After cooling at room temperature for 30 minutes, cover the cheesecake and refrigerate for at least 4 hours (preferably overnight). This ensures the texture sets properly.
By following these easy steps, you’ll get a perfectly baked, creamy, and crack-free cheesecake every time!
How to Soften Cream Cheese in the Microwave
For a smooth, creamy cheesecake, softened cream cheese is essential. If your cream cheese is too cold, it won’t blend properly, leading to a lumpy batter. The easiest way to soften cream cheese quickly is by using the microwave.
Follow these simple steps to get perfectly softened cream cheese in under a minute!
Step 1: Unwrap the Cream Cheese
- Remove the Philadelphia cream cheese from its foil packaging.
- If it’s in a plastic container, you can leave it as is.
Pro Tip: Never microwave cream cheese in foil—it can cause sparks!
Step 2: Cut into Smaller Pieces
- For faster and more even softening, cut the cream cheese into smaller cubes or slices.
- Place the pieces on a microwave-safe plate or bowl.
Pro Tip: Spreading the cubes out evenly helps them warm up more quickly and prevents overheating.
Step 3: Microwave on Low Power
- Set your microwave to 50% power (medium-low setting).
- Microwave in 15-second intervals to avoid overheating.
- After each interval, check the texture by pressing the cream cheese with a spoon or your finger.
Step 4: Flip and Stir for Even Softening
- After each interval, flip or stir the cream cheese to ensure even warming.
- Continue microwaving in short bursts until the cream cheese is soft but not melted.
Step 5: Let It Sit for a Few Minutes
- Once softened, let the cream cheese rest at room temperature for 2–3 minutes.
- This ensures the texture is smooth and easy to mix into your cheesecake batter.
Pro Tip: If your cream cheese gets too soft or slightly melted, pop it in the fridge for 5 minutes before using.
Alternative Ways to Soften Cream Cheese
If you don’t want to use a microwave, try these methods:
- Room Temperature Method (Best for Advanced Planning)
- Let the cream cheese sit at room temperature for 30–60 minutes before using.
- Works best if you plan ahead and aren’t in a rush.
- Warm Water Bath Method (Quick & Even Softening)
- Keep the foil-wrapped cream cheese in a sealed plastic bag.
- Submerge in warm (not hot) water for 10–15 minutes.
- This method ensures gentle, even warming.
Why Softening Cream Cheese Matters for Cheesecake
- Prevents Lumps – Soft cream cheese blends smoothly, avoiding grainy batter.
- Easier Mixing – Reduces the need for overmixing, which helps prevent cracks in the cheesecake.
- Better Texture – Ensures a silky, creamy consistency in the finished cheesecake.
Now that your cream cheese is perfectly softened, you’re ready to make the smoothest, creamiest Philadelphia cheesecake!
Philadelphia Cheesecake Make-Ahead and Storage
Philadelphia cheesecake is one of those desserts that actually tastes better the next day! Whether you’re preparing it in advance for a special occasion or storing leftovers, proper storage ensures your cheesecake stays fresh, creamy, and delicious.
How to Make Philadelphia Cheesecake Ahead of Time
Since cheesecake needs to chill for at least 4 hours (preferably overnight), it’s a perfect make-ahead dessert.
1. Bake the Cheesecake in Advance
- Follow the recipe and let the cheesecake cool completely at room temperature.
- Once cooled, cover the pan with plastic wrap or aluminum foil and refrigerate.
2. Chill for at Least 4 Hours (Preferably Overnight)
- Overnight chilling helps the cheesecake firm up and develop its flavor.
- For best results, let it sit in the fridge for at least 12 hours before serving.
3. Add Toppings Just Before Serving
- If you’re using fresh fruit, whipped cream, or sauces, wait until right before serving to add them.
- This keeps the toppings fresh and prevents the cheesecake from getting soggy.
How to Store Cheesecake in the Fridge
If you have leftover cheesecake, follow these steps to keep it fresh for as long as possible.
1. Store in an Airtight Container
- If you’ve already sliced the cheesecake, transfer individual slices to an airtight container.
- This prevents the cheesecake from absorbing odors from the fridge.
2. Cover the Cheesecake Properly
- If storing in the springform pan, wrap the entire pan in plastic wrap or foil to prevent it from drying out.
- A cake dome or large airtight container also works well.
3. Keep Refrigerated for Up to 4 Days
- Philadelphia cheesecake stays fresh in the fridge for up to 4 days.
- After that, the texture may begin to dry out, and the crust can soften.
Can You Freeze Philadelphia Cheesecake?
Yes! Cheesecake freezes beautifully and can be stored for up to 2 months. Freezing is a great option if you want to make the cheesecake well in advance or save leftovers.
How to Freeze a Whole Cheesecake
- Let the cheesecake cool completely and chill in the fridge for at least 4 hours.
- Remove the cheesecake from the springform pan.
- Wrap the entire cheesecake in plastic wrap, followed by a layer of aluminum foil.
- Place it in a freezer-safe airtight container or a large freezer bag.
- Label with the date and freeze for up to 2 months.
How to Freeze Individual Cheesecake Slices
- Slice the cheesecake into portions.
- Place each slice on a baking sheet lined with parchment paper and freeze for 1 hour (this prevents sticking).
- Wrap each slice tightly in plastic wrap and place them in a freezer-safe container or bag.
- Freeze for up to 2 months.
How to Thaw Frozen Cheesecake
1. In the Refrigerator (Best Method)
- Transfer the frozen cheesecake (whole or slices) to the fridge and let it thaw overnight.
- This ensures the cheesecake thaws evenly while maintaining its creamy texture.
2. At Room Temperature (Quick Method)
- If you’re short on time, leave the cheesecake at room temperature for 30–45 minutes before serving.
- Be careful not to let it sit out too long—no more than 2 hours to prevent bacterial growth.
Pro Tip: If you’re serving frozen cheesecake slices, you can eat them slightly frozen for an ice-cream-like texture!
How Long Does Philadelphia Cheesecake Last?
| Storage Method | How Long It Lasts |
|---|---|
| Refrigerated | Up to 4 days |
| Frozen (whole) | Up to 2 months |
| Frozen (slices) | Up to 2 months |
By following these storage and freezing tips, you’ll always have a fresh, delicious slice of cheesecake ready to enjoy!
FAQs About Philadelphia Cheesecake
How long should cream cheese sit out before making cheesecake?
-Cream cheese should be at room temperature before mixing to ensure a smooth, lump-free batter.
-Let it sit out for 30 to 60 minutes before using.
-If you need to soften it quickly, follow the microwave softening method from Part 8.
How long can you keep Philadelphia cream cheese after opening?
-Once opened, Philadelphia cream cheese lasts 7–10 days in the refrigerator.
-Always store it in an airtight container to keep it fresh.
-If it develops a sour smell, watery separation, or mold, it’s time to throw it away.
How long does Philadelphia cheesecake filling last in the fridge?
-Cheesecake filling (before baking) lasts up to 2 days in the fridge if stored in an airtight container.
-Once baked, the cheesecake stays fresh in the fridge for up to 4 days.
What happens if you don’t let cheesecake sit overnight?
-If you cut into a cheesecake too soon, it won’t be fully set, and the texture will be too soft or runny.
-For the best texture and flavor, refrigerate it for at least 4 hours, but preferably overnight.
How to stop cheesecake base from going soggy?
A soggy crust is a common issue, but these simple tricks will keep your crust crisp:
–Pre-bake the crust for 10 minutes before adding the filling.
–Cool the crust completely before pouring in the batter.
-If using a water bath, wrap the springform pan in double-layered heavy-duty foil to prevent leaks.
What’s the difference between Philadelphia cheesecake and New York cheesecake?
–Philadelphia Cheesecake: Lighter, creamier, and doesn’t use sour cream or heavy cream.
–New York Cheesecake: Dense, rich, and often includes sour cream or heavy cream for a firmer texture.
Can I freeze Philadelphia cheesecake?
-Yes! Philadelphia cheesecake freezes well for up to 2 months.
-Wrap it tightly in plastic wrap and aluminum foil before freezing.
-Thaw overnight in the fridge for best results.
How do I know when my cheesecake is done baking?
-The edges should be set, but the center should still have a slight jiggle.
-If using a thermometer, the center should reach 145°F (63°C).
-If you’re unsure, turn off the oven and let it cool inside with the door slightly open.
Can I make this recipe without a springform pan?
Yes! If you don’t have a springform pan, you can use:
-A regular cake pan (line it with parchment paper for easy removal).
–Mini muffin tins to make cheesecake bites.
-A pie dish for a cheesecake pie.
Why did my cheesecake crack?
Cracks are common but avoidable! Here are some possible reasons:
–Overmixing the batter (incorporates too much air).
–Baking at too high a temperature (causes rapid expansion and contraction).
–Skipping a water bath (leads to dry, uneven baking).
–Cooling too quickly (causes shrinkage).
To prevent cracks, follow the tips in Part 6: How to Prevent Cheesecake Cracking.
Can I add flavors to this cheesecake?
Yes! Here are a few delicious flavor variations:
–Chocolate Cheesecake – Add ½ cup melted chocolate to the batter.
–Lemon Cheesecake – Add zest of 1 lemon and 1 tablespoon lemon juice.
–Pumpkin Cheesecake – Add ½ cup pumpkin puree and 1 teaspoon pumpkin spice.
–Oreo Cheesecake – Mix in crushed Oreo cookies for a cookies-and-cream version.
Final Thoughts on Philadelphia Cheesecake
Now that you have all the tips, tricks, and troubleshooting advice, you’re ready to bake the perfect Philadelphia cheesecake!
Would you like me to add the SEO Rank Math elements, images, and social media captions now?